The Modern Self-Tape Guide: How to Prepare, Record, and Submit Your Best Audition
Self-tapes have given actors more control over the audition process, along with a fair amount of work that used to happen in the casting office. You're responsible for preparing the scene, finding a reader, setting up the camera, managing lighting and sound, choosing your takes, and submitting the finished audition. Sometimes with less than 24 hours to get everything done.
And while auditioning from home has its advantages, knowing when you've done enough can be difficult. Should you record another take? Is your eyeline too far from the camera? Does the scene need a different approach, or have you simply watched yourself too many times?
Having a dependable setup and a familiar recording routine makes those decisions easier. You'll still need to work through the material, experiment with choices, and occasionally solve a technical problem, but you won't be starting from scratch with every audition.
Start With the Audition Instructions
Before working on the sides, read the entire audition request. Casting offices have different preferences, and the requirements for a commercial audition may be quite different from those for a television co-star or series regular.
Pay particular attention to:
- Deadline: Confirm the date, time, and time zone. Your agent or manager may have an earlier deadline if they want to review your tape.
- Scenes and takes: Check which sides are required, whether alternate takes are requested or permitted, and whether scenes should be submitted separately.
- Framing: Look for instructions about horizontal or vertical recording, close-ups, full-body shots, or physical actions.
- Slate: Determine whether casting wants your name, height, location, profiles, or other information.
- Submission: Note the file format, naming convention, upload platform, and any size restrictions.
Don't rely on what you did for your last audition. Some offices have very specific requirements, and following them is part of delivering a professional submission.
Build a Self-Tape Setup You Can Rely On
A current smartphone, stable camera position, flattering lighting, and clean sound are sufficient for most self-tape auditions. You can build a more elaborate setup over time, but expensive equipment won't compensate for poor framing, distracting sound, or a performance that isn't ready.
Camera and framing
A smartphone recording in 1080p generally provides adequate video quality. Record horizontally unless casting requests otherwise, and use a tripod rather than having someone hold the camera.
Position the lens approximately at eye level. For most film and television auditions, a medium close-up framing you from around the chest to just above your head is a useful starting point. Leave enough room for natural movement without making the shot so wide that your expressions are difficult to read.
Once you find a good position, mark where the tripod and your chair or standing position belong. Before recording, clean the lens, silence notifications, and check the focus and exposure.
Background and lighting
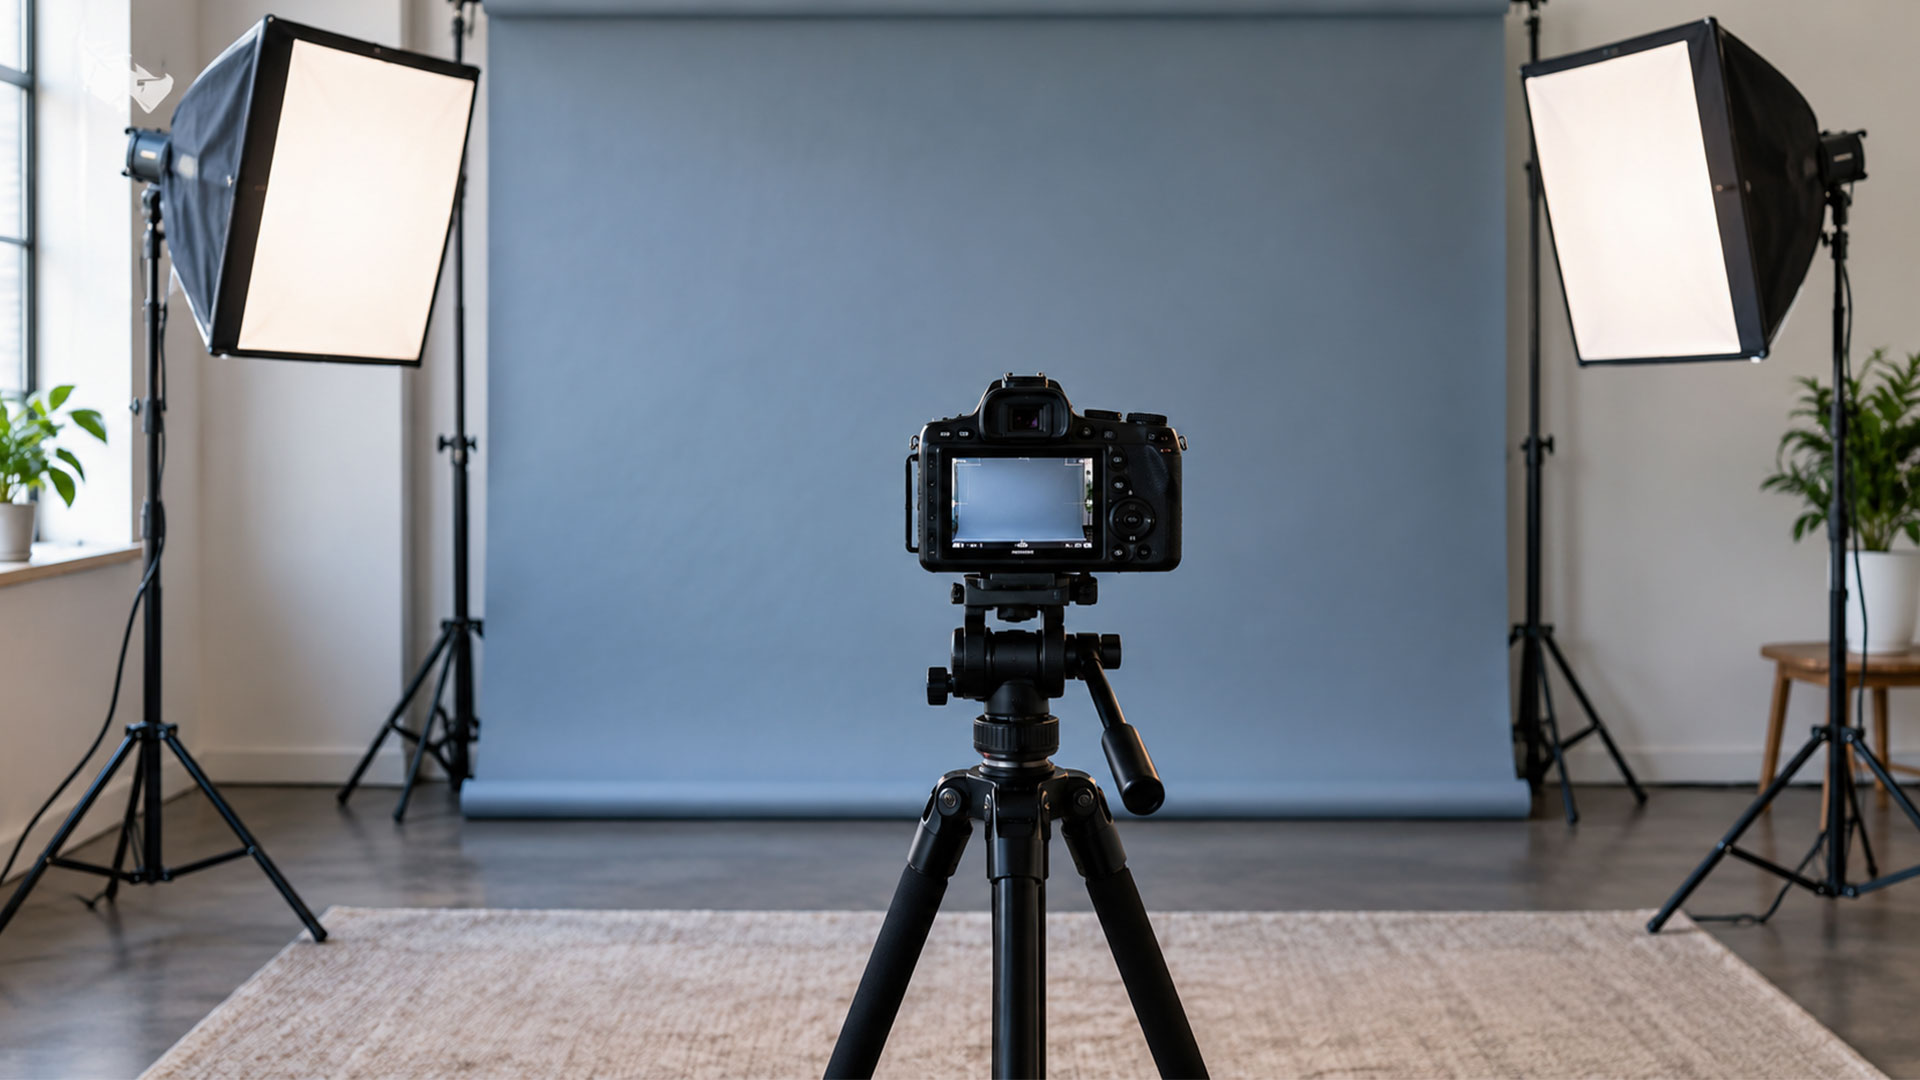
A solid or subtly mottled backdrop in light gray or muted blue works well for most actors. Choose a color that provides some separation from your clothing and skin tone, and avoid busy patterns or distracting objects.
A collapsible pop-up backdrop is a worthwhile investment if you audition regularly. They're portable, relatively easy to store, and generally require less maintenance than fabric backdrops that wrinkle. They're also useful for live virtual auditions, where artificial background effects can distort your outline.
If space allows, stand a few feet in front of the backdrop to reduce shadows.
Lighting should make your face and eyes easy to see. Natural window light can be excellent, but it changes throughout the day. If you're taping regularly, one or two diffused LED studio lights positioned in front of you and slightly to the sides will give you more consistent results.
Watch for harsh overhead shadows, bright windows behind you, and ring-light reflections that become distracting in close-up.
Sound
Before recording, make a short test and listen through headphones. Air conditioners, refrigerators, traffic, and computer fans can be surprisingly noticeable on playback.
A smartphone's built-in microphone may be perfectly adequate in a quiet room. An external microphone can provide more consistent sound, especially in larger spaces, although it won't eliminate echo or background noise on its own.
Curtains, rugs, and upholstered furniture can help absorb sound. Your reader should be audible without overpowering your dialogue.
Equipment recommendations
On-camera acting coach Anthony Robert Grasso of the Anthony Robert Grasso Studio recommends several products worth considering when building or upgrading a home self-tape setup. His training and practical approach to self-taping come highly recommended.
Disclosure: As an Amazon Associate, Up-To-Date Actor earns from qualifying purchases. Some links below are affiliate links, at no additional cost to you.
| Equipment | Recommended option |
|---|---|
| Backdrop | RAUBAY Large Collapsible Gray Backdrop, or a comparable solid or subtly mottled backdrop |
| Studio lighting | NEEWER 2-Pack Bi-Color 660 LED Dimmable Video Lights with stands |
| Higher-end lighting | Nanlite FC-60B Bi-Color LED Spotlight, SmallRig 25.6-inch Bowens Mount Softbox, and ULANZI Heavy-Duty Foldable Light Stand (sold separately) |
| Optional accent light | LUXCEO RGB LED Video Light Wand (2-Pack) |
| Microphone | Hollyland LARK A2 Combo Wireless Microphone System (USB-C and Lightning receiver package for compatible iPhones, Android phones, and Google Pixel devices) |
These are examples to research, not a required shopping list. Compare current specifications, pricing, and demonstrations before buying. You may find that your existing phone, a good tripod, and improved lighting are all you need.
Self-Tape Tip: Try a Split-Screen Slate
When casting requests both a spoken slate and a full-body shot, a split-screen slate can be a convenient way to present both.
Record two clips:
- Horizontal close-up: Speak directly to the camera and provide the information casting requested.
- Vertical full-body shot: Record yourself standing naturally, framed from head to toe.
Using an editing app such as CapCut or iMovie, position the clips side by side. The result allows casting to see your face and full-body appearance simultaneously.
Check that both images are large enough to see clearly and that the spoken slate is easy to hear. Keep the editing simple.
Some casting offices prefer traditional slates or request separate full-body shots. Only use this approach when their instructions allow it.
What About Real Locations and Props?
Some casting directors are open to actors recording in kitchens, living rooms, or other real locations when the setting makes sense for the scene. Others prefer a neutral background. Unless you know the office's preferences, a standard backdrop remains the more dependable option.
Props can be useful, particularly when an activity is central to the scene. Most importantly, every prop should serve the character's emotional life, actions, and scene objectives. Holding a coffee cup, preparing a meal, or handling a personal object can add authenticity when that activity is connected to what your character wants, feels, or is trying to accomplish.
Ask yourself: Does this prop deepen my connection to the scene and support my character's actions, or am I simply adding activity?
If you're concentrating on managing a prop rather than listening to your reader, reconsider it.
You can suggest a location or physical action without recreating an entire set.
UTDA Member Tip: Need Help With Your Self-Tape?
Not everyone has the space, equipment, or time to manage a home self-tape setup. And sometimes you'd rather concentrate on your audition than worry about lighting, recording, and editing.
Active Up-To-Date Actor members have access to Annie's curated referral list of professional self-tape services in New York, Los Angeles, and virtually. These services can help record, edit, and process your audition, taking the technical work off your plate so you can concentrate on the scene.
Prepare the Scene Before You Record
With a self-tape, it's easy to begin recording before you've fully prepared. You have the camera, the sides, and a deadline, so you start doing takes and hope the scene will come together.
Sometimes an exploratory take reveals something useful. But if you haven't made sense of the material, recording it repeatedly isn't likely to solve that problem.
Read the entire scene and consider:
- Circumstances: What happened immediately before the scene begins?
- Objective: What do you want from the other character?
- Relationship: Who is this person to you, and what do you expect from them?
- Changes: Where do you receive new information, change tactics, or make a discovery?
- Tone: How does the scene fit the project's genre and established style?
If the project is unfamiliar, research enough to understand its world. A grounded procedural drama, broad network comedy, and single-camera workplace comedy can require very different approaches.
Make choices that fit the size of the role
One of the more common mistakes actors make with small roles is trying to turn them into something bigger.
Many co-star roles are information-driven. A nurse delivers a medical update. A police officer reports evidence. A receptionist passes along an important message. These characters may appear briefly, but they have a specific job within the story.
Consider the nurse. Is this a routine update or information requiring immediate action? What's the professional relationship with the doctor? Does the nurse need a decision, a response, or simply acknowledgment that the information has been received?
Those circumstances influence the character's behavior. You don't need an elaborate backstory or an emotional moment that isn't supported by the writing.
It's also worth considering how people actually behave in those professions. Someone accustomed to delivering difficult information may be more controlled than an actor instinctively wants to play. A character's familiarity with the circumstances can tell you a great deal about how they handle the scene.
For a substantial guest-star or series regular audition, you may have more opportunity to explore conflicting intentions, complicated relationships, and changes over the course of the scene.
Look at what's happening beneath the dialogue. What does your character want but isn't saying? How does the other person's behavior affect them? Do they change tactics when their first approach doesn't work?
The amount of material changes how much of the character you can explore, but the preparation still needs to serve the story. Casting should be able to imagine your character belonging in the finished production.
How memorized should you be?
Being fully memorized is preferable. When you know the dialogue, you're better able to listen, respond, and allow the scene to develop without searching for your next line.
Of course, there will be auditions with several pages of dialogue and very little preparation time. In those situations, get as close to off-book as possible and organize your sides so they interfere as little as possible.
A few techniques can help:
- Understand the scene before memorizing. Knowing what your character wants and how the action develops makes the dialogue easier to retain.
- Break the scene into beats. Mark important discoveries, changes in tactics, and emotional transitions. A quick visual map of the scene can be more useful than repeatedly reading the pages from beginning to end.
- Learn your cue lines. Become familiar with the reader's dialogue so you know what you're responding to, rather than simply memorizing the order of your own lines.
- Know your opening and closing moments. Be particularly comfortable with how the scene begins and ends.
- Keep the sides close to your eyeline. If you need them, place them near the camera or reader. Practice finding your place with a brief glance rather than reading entire passages.
- Rehearse with your reader. Running the scene before recording can reveal where you still need help with the dialogue or transitions.
If you're using sides, don't let the effort to hide them become more distracting than an occasional glance. Your reader still needs your attention, and you need to know the material well enough to respond to what's happening.
Your Reader Is Part of the Audition
A good reader makes a difference, especially in scenes that depend on timing, interruptions, or shifts in the relationship.
Your reader doesn't need to give a fully developed performance, but they should listen, respond, and provide enough energy for you to work with.
Position the reader close to the camera, generally just to one side of the lens. This keeps your eyeline near the camera without looking directly into it. If you're speaking to multiple characters, establish separate eyelines that still allow casting to see your face.
The reader should usually remain off-camera and be audible without dominating the recording.
If you're using a remote reader, test the video call or reader service before recording. Pay attention to audio levels and delays, particularly in scenes with overlapping dialogue.
Developing relationships with a few actors who can read for one another is useful. Having reliable people you can call makes a short turnaround much easier to manage.
A live reader is generally preferable because they can respond to your timing and choices. Recorded dialogue or reader applications may be workable alternatives when necessary, provided the audition instructions allow them. The difficulty is that prerecorded lines have fixed timing, which can encourage you to anticipate rather than respond.
For a scene with significant emotional changes or interruptions, make an extra effort to find a live reader.
Make the Camera Feel Like an Audition Room
Without another actor standing directly in front of you, it's easy to become conscious of your face, gestures, and movement. You may start monitoring how you're coming across rather than concentrating on the person you're speaking to.
Pay attention to a few things when watching your tape:
- Eyelines: If your reader is too far to the side, casting may see mostly your profile. Looking directly into the lens during an ordinary conversation can make it seem as though you're addressing the viewer.
- Listening: Stay engaged when the other character speaks. You don't need to create visible reactions to every line, but your attention should remain with the other person.
- Movement: You can move within the scene, but large gestures, unnecessary pacing, or repeatedly moving toward and away from the camera can become distracting.
- Physical actions: Suggest what the scene requires without staging an entire production. A confrontation, for example, doesn't necessarily need an aggressive move toward the camera.
- Wardrobe: Choose clothing that suggests the character's world without looking like a costume. Check how it appears against your backdrop, and avoid busy patterns, logos, or noisy accessories.
Your appearance should generally remain consistent with your current headshots unless casting requests something different.
One useful exercise is to watch a take with the sound off. Notice whether your attention appears to remain with the reader, whether you're constantly adjusting your position, and whether any physical behavior looks unnecessary.
Then listen without watching. You may notice rushed transitions, anticipated responses, or changes in energy that weren't apparent when you were concentrating on the image.
These are ways to evaluate specific aspects of your work, not reasons to become more self-conscious while performing.
How Many Takes Should You Record?
Being able to record several takes is an advantage, but it's also easy to overwork a scene.
After too many attempts, actors sometimes begin reproducing expressions, pauses, or line deliveries from earlier takes. Instead of listening to the reader, they're trying to recreate the version they liked.
Before you begin, set a reasonable amount of time for recording.
- Do a technical test. Check the framing, lighting, and sound so you're not using your first full take to discover equipment problems.
- Treat the first take as an audition. Don't automatically assume it will be a rehearsal. Some actors do their freshest work early.
- Review with a specific purpose. Were your intentions clear? Did the changes in the scene register? Were you connected to the reader?
- Make an adjustment worth exploring. Try a different tactic, simplify a moment that feels pushed, or give yourself more time to respond.
- Recognize when the work is getting repetitive. If you're recording the same scene again because of a minor expression or line delivery, another take may not help.
Choosing your strongest take
The most technically polished take isn't necessarily the one you should submit.
You may have a version where every line is delivered exactly as planned, but the performance feels controlled. Another take may contain a small imperfection while revealing a much more interesting relationship or a genuine response to the reader.
Consider whether the character's objectives are clear, whether the scene develops naturally, and whether you're affected by what the other person says.
Don't automatically choose the last take because it's the newest, or the first because it felt spontaneous. Watch the performances with the story in mind.
If casting requests two takes, explore a meaningful variation when appropriate. You might change how directly your character pursues an objective or how they handle resistance from the other person. Two nearly identical performances don't provide much additional information.
Once you've selected the strongest work, finish the audition rather than continuing to record out of uncertainty.
When Should You Work With an Audition Coach?
An experienced audition coach can help you discover choices you're overlooking, work through complicated material, or understand an unfamiliar genre.
Coaching can be especially valuable for substantial guest-star or series regular auditions, comedy that requires a particular style or rhythm, and scenes involving challenging technical or emotional demands.
It can also be useful when you notice recurring habits in your tapes, such as anticipating your reader's dialogue, rushing transitions, or making similar choices across different characters.
You don't need coaching for every audition. But developing relationships with several coaches who understand your work and have different specialties gives you people to turn to when an audition warrants additional preparation.
Classes and self-tape reviews can be useful even when you don't have a specific audition. They provide an opportunity to examine your technique with someone who can identify habits you may not recognize yourself.
One resource that has particularly impressed us is The Bridge for Actors, which offers self-tape training, hands-on exercises, and feedback on audition choices and on-camera work.
A coach should help you develop your interpretation of the scene, not simply direct you into performing theirs.
Related reading: The Acting Career Tool You Might Be Overlooking: A Great Coach
Edit and Submit Your Self-Tape
Editing an audition usually requires very little. Trim the beginning and end so casting doesn't have to watch you get into position or reach for the camera.
Avoid cutting together different takes within a continuous scene unless casting requests or permits it. Music, elaborate transitions, and visual effects generally have no place in an audition submission.
Follow the instructions for combining or separating scenes, slates, and alternate takes. Don't add a slate simply because you assume one is expected. Some offices want only your name; others request height, location, representation, availability, or a full-body shot.
Before you submit
- File name: Use casting's required naming convention. If none is provided, something like
FirstName_LastName_Project_Role_Scene1.mp4is easy to identify. - Format: MP4 is widely compatible, but check the platform's current file requirements.
- Playback: Watch the exported file from beginning to end. Confirm the audio is synchronized, the correct scenes are included, and the image hasn't been cropped or rotated.
- Upload: Wait for processing to finish, preview the uploaded video, and verify that you've completed the actual submission process.
- Timing: Leave room for technical problems, especially when uploading large files.
If your representative needs to review or submit the tape, follow their delivery instructions and deadline.
After You Submit: Save the Work and Learn From It
Once you've submitted your audition, save the final tape and record the project, role, casting office, date, and any coaching you used.
You may also want to note something you learned during preparation. Perhaps you discovered a better approach to procedural dialogue, improved your connection with a reader, or realized that your first take was stronger than your fifth.
These observations become more useful when you can look back over several months of auditions rather than relying on your memory of individual experiences.
Turn strong self-tapes into marketing materials
Some of your best self-tapes may be worth keeping for reasons beyond the original audition.
If your professional footage doesn't yet represent the roles you're pursuing, a well-chosen audition scene may help demonstrate what you're capable of playing. Professional production footage is generally preferable for an actor reel, but self-tape material can be useful while you're building credits or filling gaps in your marketing.
Consider saving tapes that:
- Showcase a casting type missing from your reel. You may have dramatic footage but little evidence of your comedic work, or you've recently taped a convincing detective, physician, or attorney.
- Demonstrate a particular strength. A scene might show your comedic timing, ability to handle complicated dialogue, or skill at navigating an emotional shift.
- Reflect your current work. A recent audition may represent your present casting or abilities more accurately than older footage.
- Support a targeted submission. Your representative may benefit from having a relevant scene available when submitting you for a particular type of role.
Edit marketing clips differently from auditions
A self-tape recorded for casting isn't necessarily ready to use as a marketing clip. The original tape was prepared for a particular audition request; a marketing clip needs to work for someone who may know nothing about the project.
When repurposing a tape:
- Remove the slate and unnecessary introductions. Begin with the acting rather than the information requested for the audition.
- Choose the strongest material. You may not need the entire scene. Look for a section that clearly demonstrates the character and the quality you want to showcase.
- Preserve enough context. The viewer should understand what your character wants, who they're speaking to, and what changes during the scene.
- Keep important listening moments. Don't cut every pause simply to shorten the clip. Some of the most interesting work may happen while your character processes what they've heard.
- Edit for the intended audience. A clip demonstrating comedic timing may benefit from a different selection than one intended to showcase dramatic range.
Be selective. Not every audition belongs in your marketing library, even if you felt good about the performance. Save material that is technically strong and represents the roles you want to pursue.
Organize useful clips by genre, role type, or casting category so you can find them quickly when needed.
Important: Before sharing audition footage publicly or using it in marketing, check for confidentiality restrictions, NDAs, or other limitations. Some audition material cannot be shared without permission. When necessary, create original scenes specifically for your reel.
Review your audition patterns
Looking back at your tapes can also help you identify areas of your technique that need attention.
If you're auditioning regularly but not receiving callbacks, consider reviewing several tapes with a trusted coach. Look for recurring issues rather than treating any single audition as evidence of a larger problem.
You may discover that you're rushing emotional transitions, anticipating your reader, or approaching very different characters in similar ways.
It's equally useful to recognize what's working.
Consider the patterns in your audition history:
- Casting relationships: Are certain offices bringing you in repeatedly? Are you being seen by new offices?
- Role types: Which genres and character types are generating interest?
- Progression: Are you receiving callbacks, pins, avail checks, or opportunities for more substantial roles?
- Marketing: Are you auditioning for roles that aren't represented in your current headshots or reel?
- Technique: Have you noticed changes in your work after coaching, classes, or adjustments to your preparation?
Tracking your auditions through Up-To-Date Actor's Audition Tracking feature or your own system makes it easier to review this information over time.
Once you've submitted, there's generally no reason to contact casting unless they've requested additional information or you have a legitimate issue to resolve.
A Strong Self-Tape Process Gives You More Freedom to Act
A familiar recording setup and a dependable preparation routine make self-taping easier to manage, especially when auditions arrive with little notice.
Practice with unfamiliar sides, work with different readers, and review your work occasionally with someone whose judgment you trust. You may discover that certain habits are getting in your way or that relatively small adjustments make a noticeable difference.
You won't love every take, and some scenes will remain difficult even after careful preparation. What matters is being able to recognize when you've delivered a performance that represents your work well and submit it with confidence.